User Guide
Inversion test
If the main contrast is found to be product to product, the investigation should be continued in order to discover what created the contrast.
The inversion test is often the ideal tool for this.
The inversion test functions in the following way: We have one good and one bad product.
The goal is to invert the components of the good and bad products in order to identify which component created this contrast.
The inversion test functions if:
- We have one good product A and one bad product B
- We can measure the result to be optimized
- We are able to take the system apart and put it back together
- We have a certain number of suspicious components
The inversion test is carried out as follows:
- Isolate the extremes: Measure a batch of products and isolate the two products farthest from each other (in measurements). Choose the best of the best (BOB) and the worst of the worst (WOW)
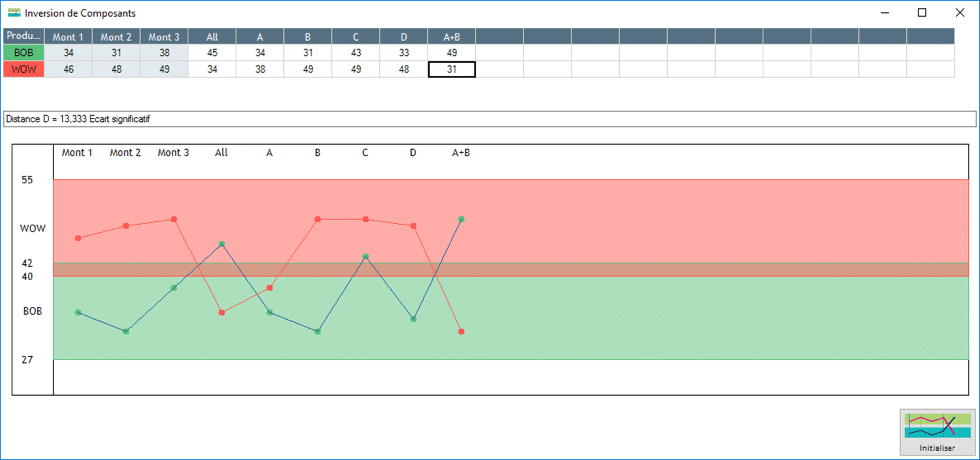
- Identify variability: Assemble and disassemble the BOB and WOW three times to find the variability in the assembly disassembly process. Once this has been performed you will have the assembly/disassembly limits:
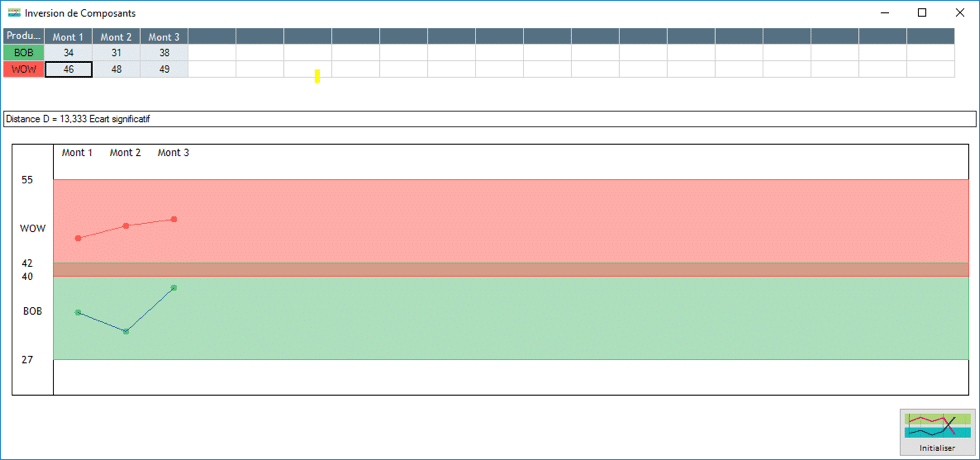
The red and green limits are the variability zones of assembly/disassembly. This means that, while assembling/disassembling the product, its value can naturally be found inside this zone.
If the measurement value is not inside this zone after replacing a component, this means that this component is the variable having a significant effect on the measurement. It becomes a suspicious component.
- Maker sure that the problem truly originates from this component:
- The distance D must be more than 1.25
- Replace all the components and verify that the inversion exists
- Replacing the components: Replace the components one by one and identify the component or components that created the inversion
Example 1:
Component D caused the inversion, it is the main suspect
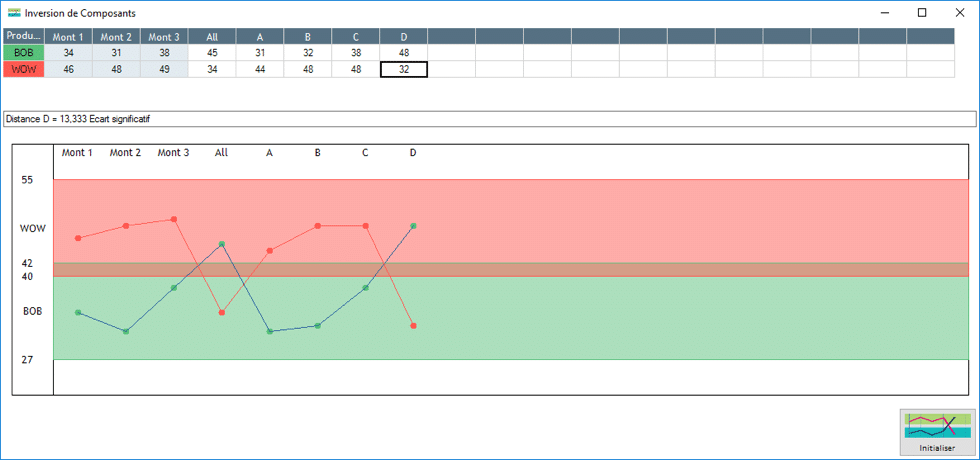
Example 2:
Components A and B are both responsible for the defect, therefore a hat test must be carried out at the end of the inversion to support this hypothesis